The King’s Coronation 2023 Teddy Bear

Original art work created and illustrated by Hannah Crawford subject to copyright.

Original art work created and illustrated by Hannah Crawford subject to copyright.
The Bourjois Palette Les Nudes is a perfect little cosmetic for your make-up bag. The palette is an ideal size with a variety of stunning colours that have an incredible staying power.
Frankly, I have never really been that big on eyeshadows; I am somebody who can take them or leave them. Quite often I don’t wear any eyeshadows at all. However, when I purchased this little beauty from Bourjois, I was stunned with how powerful the little eyeshadows actually are. Although the Bourjois Palette Les Nudes is a fair size, the colours themselves appear to be small. Therefore, I wasn’t too optimistic about the eyeshadows lasting me for a decent amount of time. It turns out that I couldn’t have been more wrong!
Firstly, because I am so impressed with the quality of the eyeshadows and the beautiful effect they have on my eyes, I have been wearing the Bourjois Palette Les Nudes almost every day since I purchased them, over seven months ago! After a full seven months’ worth of use, the Bourjois Palette Les Nudes is still going on strong in my make-up bag. The white eyeshadow, which I use the most has now almost entirely gone, followed by the bronze shade which has just under half left and the rest are still completely full.
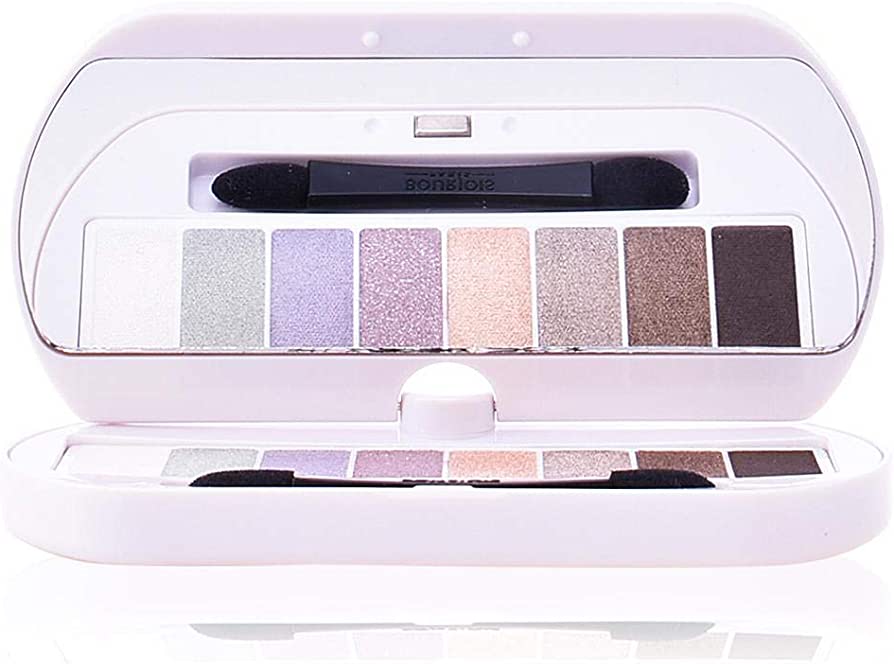
The pigmentations of each of these colours are purely outstanding, and the durability is just as amazing. I usually apply the Bourjois Palette Les Nudes eyeshadows early in the morning, just before the school run and it literally lasts on my eyes for the entire day. Bourjois claim that the Palette Les Nudes eyeshadows last for up to 12 hours and I would have to agree with this statement. The eyeshadows barely even fade, if at all. After several hours of wear, the colours still look just as vibrant as they did when I put them on. Although I am talking about a typical casual day, so if your day is more physically active you may need to top the eyeshadows up again in the evening. Even when I have worn the eyeshadows in the bath or shower, they don’t slide off and smudge down my face as most eyeshadows do.
As a sleep deprived mummy, long gone are the days where I could get a full eight hours of sleep. Quite often I am lucky to get four or five good hours of sleep, and the crack of dawn wake ups are now an everyday thing. So I need all of the help I can get with my puffy eyes and enormous bags which have now become the norm. So I am so thankful as to how this little palette of gold can immediately glam up my eyes and have me looking like an ordinary woman once again, rather than a like zombie.
The Bourjois Palette Les Nudes has eight beautiful different shades in them, which allows you to create a variety of looks to wear during the day, night or to suit any occasion. The texture of the eyeshadows is so soft, and I believe this is the reason as to why they have lasted me for so long because you don’t need to use a lot of the eyeshadows on your face nor do you need to build up multiple layers. The eyeshadows blend really easy with just one simple brush and layer.
Since I have started wearing the Bourjois Palette Les Nudes a lot of people have asked me about and commented on the type of eyeshadows that I am wearing. I would definitely recommend these eyeshadows to anyone who wants to glam up their eyes, without looking over the top. I think the Bourjois Palette Les Nudes is perfect for any woman’s handbag.
If the nude collection isn’t for you, don’t worry because Bourjois also offer a Palette Les Smoky, which I imagine is just as fabulous as the Palette Les Nudes.
The Bourjois Palette Les Nudes box alone looks so adorable and chic. The box comes in a nice compact little shape, and there is a good size clear mirror inside. So if you want to take the Bourjois Palette Les Nudes out with you in your handbag, there is no need to take out a compact mirror as this already has one. Another unique thing about this product is how it opens and closes. It isn’t just an open and shut eyeshadow as most products are. Once opened, the mirror can swivel 360֯, and it also tilts at an angle which is perfect if you need to capture some good lighting. I really do love it!
Overall I can’t fault the Bourjois Palette Les Nude. In my eyes, I would have to say that the eyeshadows are worth the money and I am glad that I purchased them. Therefore, I rate the Bourjois Palette Les Nudes a glamourous 5/5 stars. Well done Bourjois you have converted me into loving eyeshadows. I will defiantly be purchasing this product again.

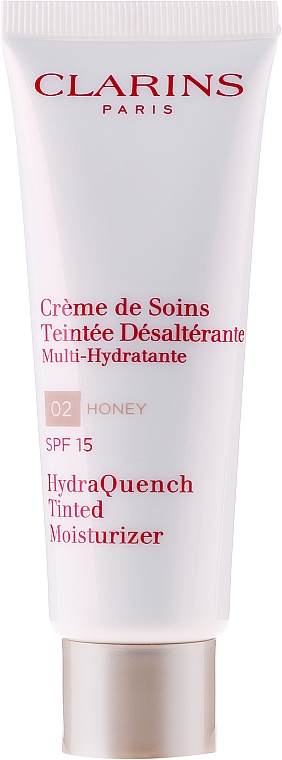
I first purchased the Clarins Hydra Quench Tinted Moisturizer after I tired the product with a beautician in a Boots store at the beginning of the year. I can genuinely say before I had ever tried the Clarins Tinted Moisturizer I was quite sceptical when it came to trying and buying any tinted moisturizer products, this was due to bad experiences that I have had in the past. However, as soon as the Clarins Tinted Moisturizer was applied to my face I was immediately impressed by the quality of the product. The beautifying mineral pigments that it boasts, helped to even out my skin tone and left my skin looking fresh and radiant.
Clarins Hydra Quench Tinted Moisturizer really does leave you looking like you have a natural healthy glow. I am so impressed with this moisturizer that after over fifteen years of wearing foundation daily, I have now stopped and have instead started wearing the Clarins Hydra Quench Tinted Moisturizer because I love how natural looking it is. This product has made a huge impact to my life, and it has changed how I feel about buying and wearing tinted moisturizers.
Clarins Hydra Quench Tinted Moisturizer has a SPF of 15, this makes wearing the moisturizer in the summer months easier and more suitable. I personally wouldn’t be happy with a SPF lower than 15 as I think this is the least that we should be applying in order to protect our face, especially when you are out in the hot sun. Clarins Hydra Quench Tinted Moisturizer have got the sun protection just right as it provides a threefold protection against UV rays. In addition to this it has 100% mineral protection together with pollution and free radicals. If you would like to apply a stronger a SPF to your face before you apply the Clarins Tinted Moisturizer it shouldn’t change the look, coverage or texture of the moisturizer on your face. This is a huge bonus, especially as this can be so difficult to achieve with foundations.
I think Clarins Hydra Quench Tinted Moisturizer is a great product for the summer time, especially if you are trying to build up a tan. The moisturizer isn’t cakey like most foundations; it also doesn’t leave any marks on your clothing which is also a plus factor. The moisturizer feels so light on your face; it literally feels like you are not wearing anything at all.
Some tinted moisturizers can leave your face feeling greasy and oily, and after a few hours of wear they can begin to feel like they are sliding off of your face. Clarins Hydra Quench Tinted Moisturizer doesn’t leave your face feeling like this. From the very start of applying the moisturizer, it leaves your face feeling comfortable, soft, light and velvety, even after hours’ worth of wear.
Clarins Hydra Quench Tinted Moisturizer contains a natural ingredient called, Katafray. Katafray is a native tree found across Madagascar. Its essential oils are renowned for its fortifying and soothing actions. It is anti-inflammatory and possesses analgesic actions as well as being a relaxant tonic. Katafray has traditionally been used to ease redness and itching of the skin, including eczema. It is also habitually used in face mask products, as it is believed to help with fine lines and wrinkles.
If you are wanting to go for a more natural look, then I would strongly recommend that you try Clarins Hydra Quench Tinted Moisturizer. The moisturizer has a hint of colour that provides you with a very light and natural looking coverage. There are seven different shades of Clarins Hydra Quench Tinted Moisturizer to choose from. A beautician picked the correct shade for me as I was trailing the product in store. If you would also prefer this option you can pop along into any department store such as Boots or Debenhams and ask the Clarins concession stand for a free trial, they will be more than happy to help you out.
Moreover, the Clarins Hydra Quench Tinted Moisturizer also lasts for a good amount of time. I have started wear this moisturizer almost every day, from the moment that I first purchased the product, and I still have a fair amount left in the bottle. This means that so far the moisturizer has already lasted me for nine whole weeks and the bottle is far from empty. This is probably due to the fact that you don’t need to apply a large amount of the moisturizer to your face, nor do you need to add multiple layers. Just one small layer will give you a full face of coverage and it lasts for hours. The tinted moisturizer doesn’t last as long as some foundations do, and I personally find that after eight hours of wear I need to top the moisturizer up and add a fresh layer to my face in order to brighten it up. Really, there probably isn’t no need for me to do this, it is just a bit of a habit. I also choose to wear a thin layer of powder over the top of the moisturizer. Once more, there probably is no need for me to do this, however it makes me feel more comfortable and less naked, after all I am used to wearing foundation every day for the past decade. I do think that a light powder over the top of the moisturizer just gives you’re face that perfect finish.
One of the negatives points that I have noticed with the Clarins Hydra Quench Tinted Moisturizer is that it isn’t strong enough to cover or hide the bags underneath my eyes. Therefore, if you have just had a baby or have a toddler that still wakes you up in the middle of the night, you may need to get some extra help and purchase some additional products to help conceal the bags. I have been using a light concealer underneath my eyes before apply the Clarins Hydra Quench Tinted Moisturizer to my face, which seems to do the trick in brightening my eyes up. Also, if you have a lot of blemishes or scaring on your face, this coverage probably wouldn’t be strong enough to mask them. I would say that this is the only major downfall of the Clarins Hydra Quench Tinted Moisturizer. Albeit, it is still only a moisturizer and not a foundation.
In conclusion, I am extremely impressed with the Clarins Hydra Quench Tinted Moisturizer, and it has most definitely won me over. It is a product that I will be purchasing again in the near future. So the main question is, is the Clarins Hydra Quench Tinted Moisturizer worth the money? Yes, I would have to say that it is, and I am very pleased that I purchased this product as it has done me proud and been worth every last penny.
Unfortunately, the Clarins Hydra Quench Tinted Moisturizer isn’t perfect, the coverage doesn’t last for as long as I would hope for and I feel the hint of colour could be increased just a little bit. Despite all of this I am extremely pleased with the product and will continue to wear it daily. Overall I rate the Clarins Hydra Quench Tinted Moisturizer a brilliant 4/5 stars. Well done Clarins for converting me!


There is no precise time that you should pack your hospital bag for, however it is a good idea to have one packed by weeks 34/35. Some women decide to pack their hospital bags much earlier on, it is completely your choice. What exactly you pack inside of your hospital bag is entirely up to you but there are a few essentials that you should pack inside the bag that you will need for both you and your new-born baby.

Although there are companies who provide pre-made up hospital bags, and brands who sell hospital bags targeted purely at pregnant women you do not have to buy any of these products. A normal holdall, cabin bag, or even a small suitcase will do just fine.
For you:
Dressing gown
Slippers
Towel
Maternity pads – around 24
Breast pads
Paper/disposable knickers
Comfortable clothes for going home in.
A night gown that you don’t mind getting ruined or a large baggy T-shirt.
Copy of your birth plan.
Underwear (You don’t know how long you will be in the hospital for).
Non-wire/nursing bras if breastfeeding.
Hairbrush
Toiletries and make up (for photographs) including toothbrush.
Comfortable shoes
Thick, warm socks
High energy snacks
Fruit drinks
Magazines/crossword/books
Camera
Small change
Music
Tens machine
Massage oils
Front opening tops or loose fitting tops if you’re planning on breastfeeding.
For your baby:
Nappies – Newborn size
Cotton wool balls
Baby wipes
Baby blanket
Baby towel
Sleepsuits
Baby vests
Hats
Bibs
Mittens
Pair of socks or some booties
Muslin squares
An outfit for the trip home
Jacket or snowsuit
Once you have packed your hospital you should keep it somewhere that is easy to remember such s in the hallway, side of your bed or in the car ready for your trip to the hospital.
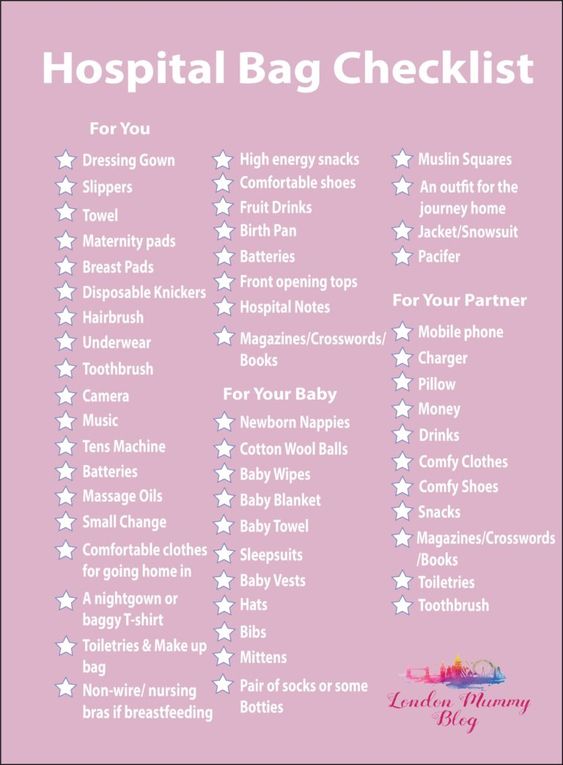



Original art work created and illustrated by Hannah Crawford subject to copyright.


What you will need:


2.) Place the cubes of jelly into a large mixing bowl. Add 1/2 pint of boiling water to the mixing bowl & stir until all of the jelly has dissolved.

3.) Add half a pint of cold water to the mixing bowl and gently stir.

4.) Place the raspberries evenly into your glasses of jelly mould.

5.) Pour the jelly mixture into the glasses or into your jelly mould. The raspberries will rise to the top of the jelly.

6.) Place the glasses or the jelly mould inside of the fridge for 6 -12 hours. For the best results leave overnight to set.

7.) When the jelly has set, you can remove it from the fridge. It is now ready to eat!

Enjoy!
Recipe by Hannah Crawford

Recipe by Hannah Crawford


Ingredients
⦁ 200g Strawberries
⦁ 120ml Whole Milk
⦁ 2 Teaspoons Sugar
⦁ 1 Teaspoon Vanilla Extract
⦁ 4 Scoops of Vanilla Ice Cream
Method
⦁ Place 200g of fresh or frozen strawberries in a mixing bowl.
⦁ Add in 2 teaspoons of sugar and 1 teaspoon of vanilla extract to the strawberries. Mix the ingredients together and set aside for 15-20 minutes.
⦁ Place the strawberry mixture into a blender and add in 4 scoops of vanilla ice cream and 120ml of milk.
⦁ Blitz the blender for 1-2 minutes, or until the mixture is smooth.
⦁ Pour the milkshake out into a tall highball glass.
⦁ The drink is ready to serve.

Recipe by Hannah Crawford
Photography by Hannah Crawford

Recipe by Hannah Crawford
